
Knowledge really is power. And there is nothing more valuable than having that knowledge and being able to make people’s lives better with education.
So if you have what it takes to research, learn, and then share that with others, you can easily make a huge chunk of money selling online courses! In this article, I’ll go over five websites where you can start putting together your course and selling it for free. I’ll explain how each site works and how you can get started using each of these great websites.
I’ll also give you a few tips that you can use as you are creating valuable courses worth paying for. So with that said, let’s find out what these two websites are!
1.Udemy (Beginner Friendly)
If you’re new to the idea of creating an online course, Udemy makes it easy to become an online instructor and the best part is: it’s for the most part free to use! That’s why, if you’re a beginner, I highly recommend Udemy.
Now there are two different ways to use Udemy. You can create courses that people can access for free. But, of course, you want to know how to make money off your course. In order to do this in Udemy, you need to apply to become a premium instructor.
First, however, let’s take a look at how exactly Udemy can work for you.
How Do Udemy Courses Work?
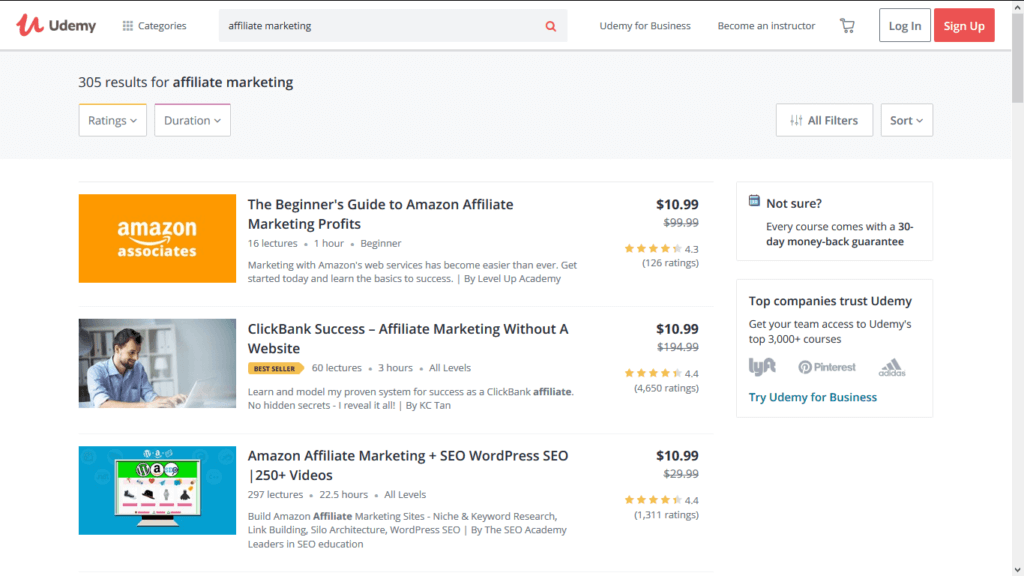
Basically, courses on Udemy are mostly video-based. This means you record lessons for your course in the form of videos. Simply get in front of the camera, have an idea of the lesson you’re going to give, and record as you narrate. Make sure you are looking straight at the camera, to keep your student engaged.
Now if you’re the type of person that chooses not to show their face, that’s not a problem! Consider using a screen recorder that can film your presentation program such as PowerPoint. All you need to do is have the lessons in your presentation prepared and you can narrate the lessons as you go along!
Before your course can go live, you need to have at least 5 video lessons that altogether last at least 30 minutes. If you need help getting ideas for your course, read the tips I have provided at the end of this article.
Besides videos, you can also provide assignments, quizzes, and exercises for your students to complete. This can be very beneficial as it allows your student to get the most out of their education with you and will also help them retain the knowledge you had just shared with them.
How Do I Get Started?
First things first, though, you need to create your Udemy account. On the Udemy site, click Sign Up on the upper-right corner. Then just follow the simple steps provided to get your Udemy instructor account up and running!
Now the next step is to become premium. According to Udemy’s help page here, you’ll find this option as you create your course and set a price for it. Then you will be given an application to complete. The application is free and you will need to give Udemy some important information. You will also be asked on how you want to receive your money. There are two options that Udemy offers for payment: either PayPal or Payoneer.
Once you submit your application, it could take up to three days before your application gets approved. But as soon as it does, you can get right down to creating your Udemy course and setting your own price tag for it.
Here’s one thing to keep in mind, though: every time someone buys your course, Udemy will keep a percentage of the sale made, according to their revenue share policy. But it does make sense, doesn’t it? Udemy needs some form of monetary support, especially given that they offer course building for absolutely free!
So, if you’re ready to get going, visit Udemy’s site below!
BECOME AN INSTRUCTOR ON UDEMY!
2. Teachable (Professional Site)
Looking for a more advanced and professional way to create your online course? Then look no further than Teachable. It’s my number-one recommendation for creating well-made courses that will keep your students engaged.
Teachable is absolutely free to use as long as you’re OK with Teachable taking a portion of the sale you make on your course. There are some paid features that could enhance your course even more. But the choice is yours to make. Teachable’s pricing plans can be found here.
How Do Teachable Courses Work?

Unlike Udemy, where you are building your course on the site itself, you can set up your course on a domain of your choice. You could either pay for the domain you want or use a free subdomain (meaning your subdomain would be yourcoursename.teachable.com). Basically, your course is on its own website rather than on Teachable’s!
Every Teachable course is divided into sections and lectures. Virtually any form of media can serve as a lecture, so you’re not limited to just mainly videos as you are with Udemy. Instead of a video, you could write PDF documents, record audio narration, or even use graphics and imagery. You can also add quizzes and even certificates of completion to your course. In Teachable, the customization of your course is practically limitless!
How Do I Get Started?
On the Teachable site, click on the “Get Started” button on the upper-right corner. Follow the simple instructions and, once your account is set up, you can create your own Teachable “school” (the site where your courses will be hosted). In your school dashboard, you can begin designing your first course and providing it with the lecture material of your choice.
The dashboard of Teachable is really straightforward and user-friendly, so it is almost effortless to put your course together the way you want it. If you like using WordPress to create websites, you’ll love using Teachable to create courses!
After your course is finished and ready for sale, keep in mind that, just like with Udemy, Teachable will keep a portion of every sale you make with your course. Now, if you choose to go with one of Teachable’s paid plans, either Teachable will reduce the amount they take from your sale or stop taking altogether.
With lots of customization options, flexible plans, and an easy-to-use course builder, what’s not to love about Teachable?
START INSTRUCTING USING TEACHABLE!
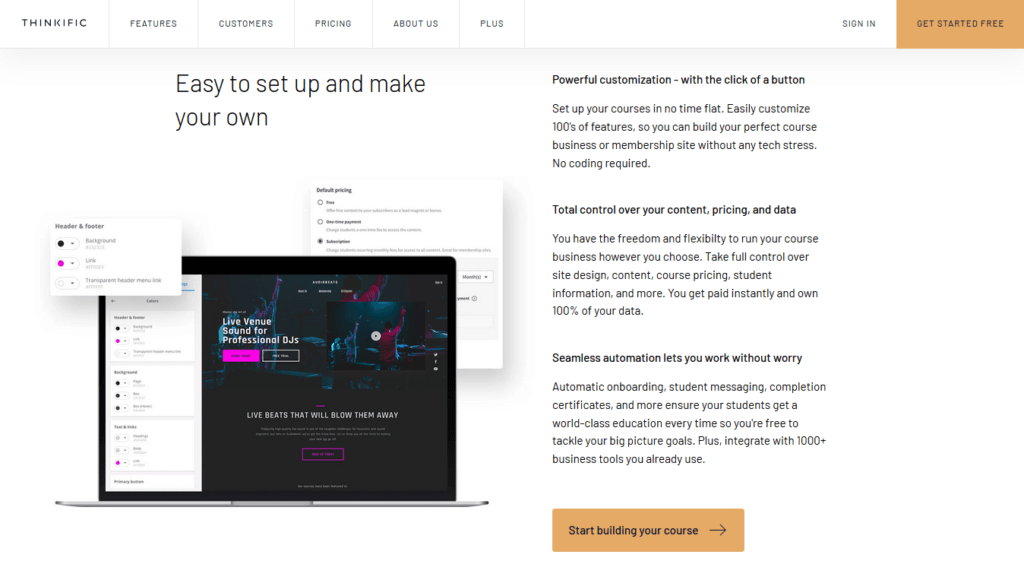
3. Thinkific (Amateur Friendly)

I like to look at Thinkific as a simplified version of Teachable. You have many of the things that you need to create a good-looking online course, but it has less of the technical stuff so it’s ideal for beginners and even amateur course creators.
Many of the features on Thinkific are free, but if you want your course on your own website, then you will have to pay at least $40 a month to get the basic package which allows you to connect your course to your own domain along with a bunch of extra perks. You can check out their plans here.
How Do Thinkific Courses Work?
Basically, you can create your own online course on Thinkific with text lessons, videos, illustrations, quizzes, and more. You can put up your course on a free website with the Thinkific subdomain (example.thinkific.com) or you can pay extra to publish your course website on its own domain.
Just like Teachable, there are no extra fees with Thinkific except for the transaction fee you will pay if you make a sale with your online course.
And, if you get lost while trying to create your online course, Thinkific has a huge knowledge base where there are many articles you can look through to help you learn or to help you solve any problems you encounter.
How Do I Get Started?
Once you get to the Thinkific website, you’ll see a big button on the top right corner of the screen where you can create your free Thinkific account. All you need to give them is your name, your email, and create an account password.
Inside your account, simply create an online course and give it a name. At that point, you can set your whole course up. You can then add lessons inside your course and, inside each lesson, you can choose different types of content to add to your lesson: from text to videos to graphics to quizzes and more!
After you put your course together, you will need to connect to a payment account with either Stripe or PayPal in order to receive your payment for any sales you make with your course. Then you can decide how much you would like to sell your course and decide if you want the payment to be one-time or recurring every month.
As you can see, Thinkific has a ton of simple and straightforward tools to help you create an online course that sells.
CREATE A COURSE WITH THINKIFIC!
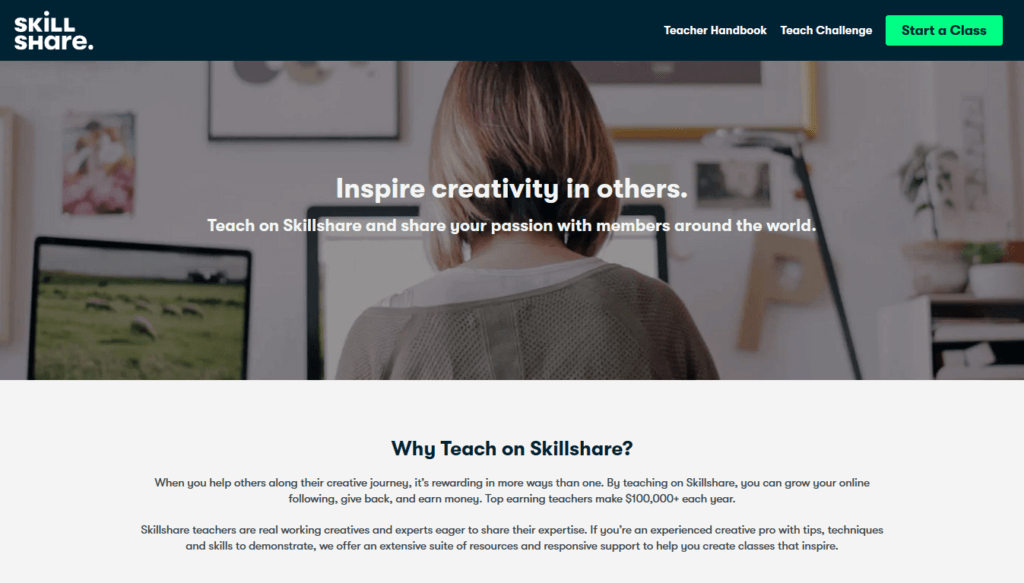
4. SkillShare (Skill Teaching)

If you are knowledgeable with a certain skill, you can share your knowledge by creating an online course with SkillShare. With this website, you can easily get new students to purchase your course and learn their desired skill through you.
SkillShare will actually publish your course inside its course library and, while you can’t exactly price your course, you do earn money whenever someone with a premium SkillShare membership watches videos inside your course. So yes, you can earn money creating a SkillShare course, but the way you earn the money is a little different than most other online course websites.
How Do SkillShare Courses Work?
The way SkillShare works is similar to Udemy. All you do is create a course composed of video lessons and publish it inside the SkillShare library.
However, there is a big difference. Courses on SkillShare do not have price tags on them. That’s because SkillShare makes money not from the courses, but from a membership model. Certain SkillShare courses that are being monetized are part of SkillShare’s premium library and, to access this library, a student would need to be a premium member.
This premium membership will cost students around $15 per month. Once they’re a premium member, they are free to join any course inside the premium library. If they decide to join your course, then you earn money (known as “royalties”) based on how many minutes of your video lessons they watched.
Besides making money from the amount of time your video lessons get watched, you can also earn money by getting students to sign up as premium members of SkillShare in order to access your course. You should have a referral link that you can share with them so, that way, you’ll get credited for those students who became premium members because of you.
How Do I Get Started?
To start, head over to the SkillShare website. You’ll need to create a SkillShare account in order to create your first online course. Once you have an account, all you need to do is record appropriate video lessons on your particular skill and then upload them to your course.
If you’d like help putting your online course together, SkillShare does have a Teacher’s Handbook that can walk you through all the steps you should take in order to get started creating an online course and making money as well.
You can also earn extra money through the referral section of your SkillShare account. Simply share your referral link along with your new course to people you think may be interested, and once you get a premium student into your SkillShare course, or even if you get them to start their free trial, you earn money!
SkillShare definitely makes it easy to teach your skill step by step to your students in a friendly and engaging manner, all while getting paid for it.
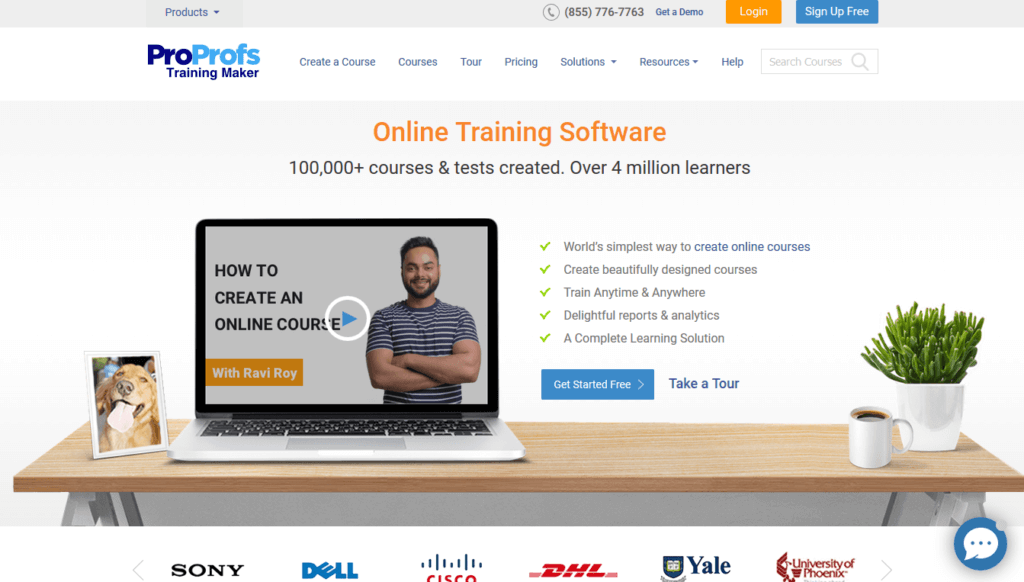
5. ProProfs Training (Teach Like a Pro)

Trusted by millions of people around the world and several big companies like Adobe, Dell, Sony, and Nestle, ProProfs is home to millions of online courses that are professionally made and reasonably priced. You too can become a course instructor with ProProfs and teach others how to become a pro in a specific subject and, of course, earn money selling your knowledge!
And the best part is: it’s completely free to join ProProfs and create an online course that can make you good money!
How Do ProProfs Courses Work?
ProProfs is a very professional online course website since it gives you tons of options for setting up online courses.
An interesting thing about ProProfs is that some of its courses are in the ProProfs Store while other courses are actually being hosted on custom websites! This gives you two choices as to where you want your course to be seen.
You also have flexibility with the kind of content you want inside your course. Unlike Udemy, where you’re stuck with video content, ProProfs allows you to add videos, text, illustrations, presentations, and other forms of media to your course. They even let you choose the payment options on how you want your potential students to pay for your course. Even better, they give you the ability to add coupons or discounts to your course price at any time.
ProProfs is truly a professional way to get an online course going for pretty much free. The only time you pay is your transaction fee when your course sells.
How Do I Get Started?
On the ProProfs Training website, go to the Sell Online section and choose the button to sign up for a free ProProfs account. You will be able to change later to a paid plan for $30 a month that will allow you to create your own brand and website to go with your online course.
After you’re signed in, you can start putting together your course lessons and adding all sorts of media to help get your lesson across to your potential students. You can even add quizzes and surveys as a way for students to review what they have learned.
There are loads of other customization options that you can add to your course, even in the free plan, such as certificates, themes, and more! Last but not least, you will be able to publish your course either to the ProProfs Store or to your own website under a paid plan.
ProProfs is probably the best website you can use to create a course with professional lessons, videos, and much more for absolutely free!
Conclusion
3 Tips for Creating a Valuable Online Course
Now, to wrap up this article, I promised I would share some tips on creating an online course that will be worth your student’s money.
So here they are:
- Find your interest and do lots of research! You don’t want to be “the blind leading the blind.” So even if you have some knowledge about something you’re interested in, you should always research on your passion. After all, nobody’s a guru (even though some claim to be). You don’t want to teach off the top of your head, because we humans are all susceptible to error. Make sure the knowledge you have is really the facts before including it in your course.
- Be detailed but understandable! As you’re teaching, you don’t want to rush right through a lesson. In a course, you need to give everything the student needs to know, from A to Z. So give as much knowledge as you can possibly give, whether it is by making some of your lessons bigger or creating dozens of lessons. Also, make sure your course is beginner-friendly. Don’t use special words, such as new terms, unless you give their definitions. Make sure your student is given a lot of value that they can take in easily.
- Offer your course at an affordable price! Start selling your course at a low price. I know it’s always tempting to jack up the price for your course, especially if you put a lot of time and effort into it. But start small then as your course gets attention, slowly up the price over time. For example, if I created a 10-lesson course, I’d list it at $30, but then if my course gets a lot of students enrolled, I’d bump it up to $50, and later $80, until I get to $100 and beyond. Finally, make sure the amount of knowledge you put into your course is equivalent to the value of the price you are selling it for.
Final Words
With that being said, I hope this article helped you out with deciding how to sell an online course to make money. Be sure to look into each of these websites I just showed you and bear in mind these three tips to help you succeed quicker as an online instructor. Happy teaching!