
How to Start a Blog and Make Money for Beginners
Here is your step-by-step guide on how to start a blog and make money for beginners.
A blog is a website with posts (articles) on different topics. These topics are part of a niche, like travel, parenting, health, and finance. This isn’t the same as blogging for a hobby.
Now, the big question: is blogging dead in 2026? Here’s what we know.
The good news: 80% of people online still read blogs. We also know AI assistants like ChatGPT and Gemini may read blogs to provide more confident answers to queries.
The bad news: 68% of people use Google without clicking onto a website thanks to AI Overviews. This means fewer people are going to find your blog through Google.
Overall, you can still make money blogging in 2026, but don’t rely on Google for traffic. I suggest building an audience on platforms like YouTube. There, you can tell them about your blog. Once they start reading, you can start making money!
Here are some ways you can make money blogging as a beginner:
- Show ads on your blog
- Do affiliate marketing
- Write sponsored posts
- Start an email newsletter
- Sell an online course
- Form a paid community
Remember: focus on one method at a time. Don’t try another method unless the one you tried didn’t work or you’re not comfortable with it.
Ready to make money blogging? Let’s begin!

How to Start a Blog
If you already have a blog, you can skip to the money-making methods below:
But if you don’t have a blog yet, here’s how to get started!
Step 1: Pick a Niche
First, what’s your blog about? A niche is the area of life that your blog will focus on.
There is all sorts of advice about what niche you should pick. Some will say “pick the highest-paying niche,” while others will say “pick a niche you’re passionate about.”
My Recommendation: Pick a hobby or lifestyle niche to lower competition from bigger websites. And make sure it’s a hobby or lifestyle you would enjoy doing, even if you’ve never done it before.
For example, if you love exploring the city, you can run a travel blog.

For other niche ideas for a blog, check out Sometimes Homemade’s 51 hobby ideas.
And don’t forget to name your blog. You’ll need it as a domain name. Use Instant Domain Search to see if your preferred domain name is available.
Read more: Most Profitable Blog Niches to Make Money
Step 2: Sign Up for Hosting
Next, it’s time to create the website for your blog. To do this, you need web hosting.
There are many hosting providers out there, but these are the two I recommend:
| Provider | Basic Plan | For 1st Year | After 1st Year | Standout Features |
|---|---|---|---|---|
| Bluehost | Starter | $2.79/month | $8.99/month | Cheap hosting, AI site builder |
| Hostinger | Premium | $3.49/month | $10.99/month | Drag-and-drop site builder |
My Recommendation: Bluehost. They are the ones hosting WebCents, and they make it easy to build your new blog. Use my affiliate link to start your blog for only $2.79 a month for your first year!
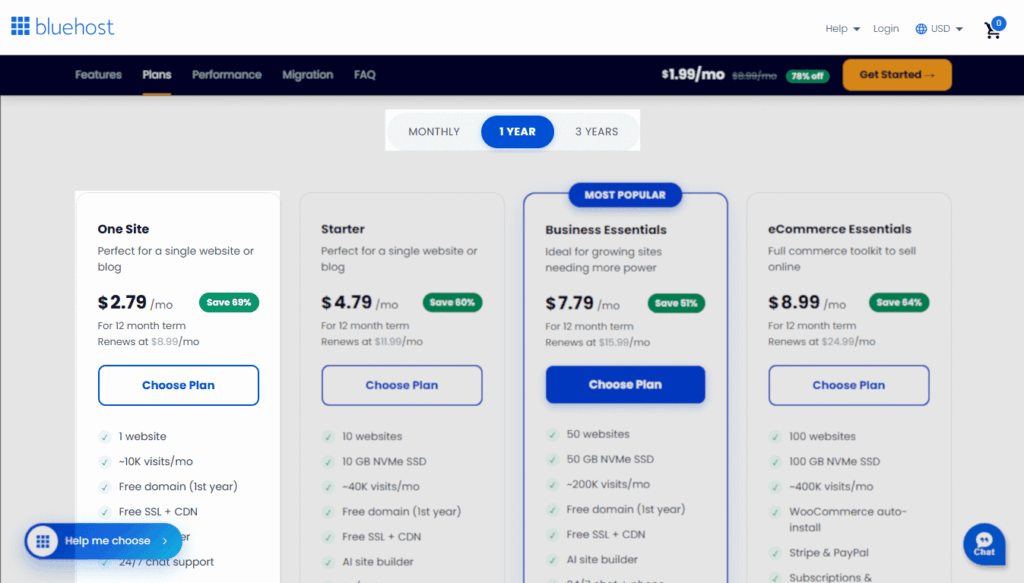
Follow these steps to get started with Bluehost:
- Use this link to get the $2.79/month offer.
- Click the white Get Started button.
- Click 1 Year at the top to try Bluehost for 1 year.
- Under One Site, you’ll see $2.79. Click Choose Plan.
- Enter your preferred domain name. It’s free for your first year!
- Click Search Domain to see if it’s available. If so, move on to step 7.
- Create an account password. The add-ons aren’t necessary.
- Review your order, enter payment info, and click Submit Payment.
That’s it! You now have your own blog! (If you run into problems, you can contact Bluehost customer support, available 24/7.)
Step 3: Set Up WordPress
WordPress is a free program that helps you design your blog and write blog posts.
Bluehost automatically installs WordPress for you. If you use Hostinger, they have a tool that can help you set up WordPress.
After installation, remember to save your WordPress username and password. Once you log in, you’ll see your WordPress dashboard.
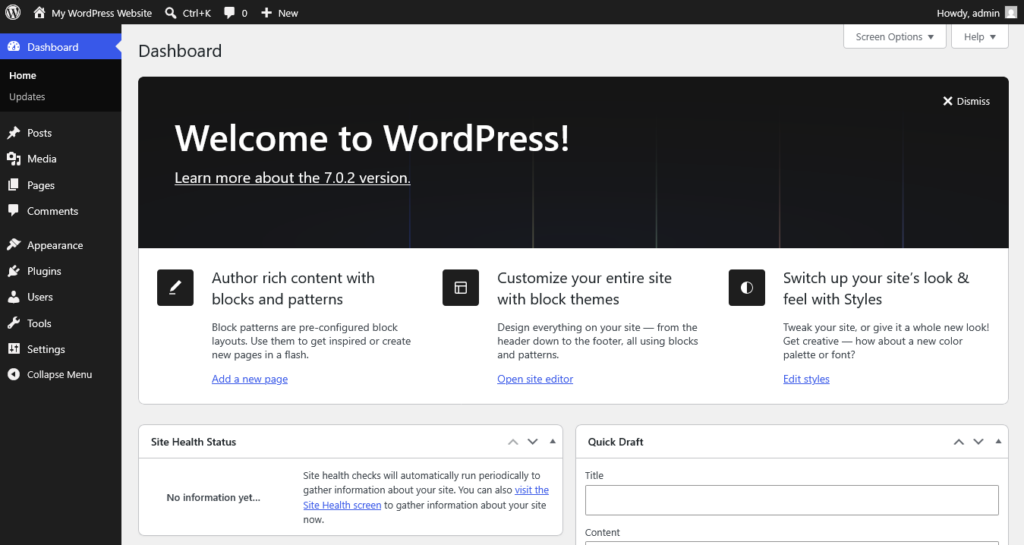
You can log in to your WordPress dashboard anytime by adding /wp-admin to your site’s URL in the address bar: example.com/wp-admin.
Navigate using the tabs on the left-hand side. Here’s a quick rundown of some of them:
- Posts: create and edit your blog posts and categories
- Media: upload and manage images and files
- Pages: create and edit your site pages (About, Contact, Privacy Policy, etc.)
- Appearance: change how your site looks with themes
- Plugins: install tools that can add settings and features to your site
Check out WPBeginner’s WordPress 101 video course to learn more about how to use WordPress.
My Recommendation: Pick a mobile-friendly WordPress theme. Many of us browse on our phones, so make sure your blog looks good on a small screen.
Step 4: Find Keywords
Next, you need keywords. Every article you write should cover a keyword in your niche that people are searching for.
Here’s how I do quick keyword research for WebCents step by step:
- Go to the Ahrefs Free Keyword Generator.
- Enter a keyword related to your niche.
- Check the results.
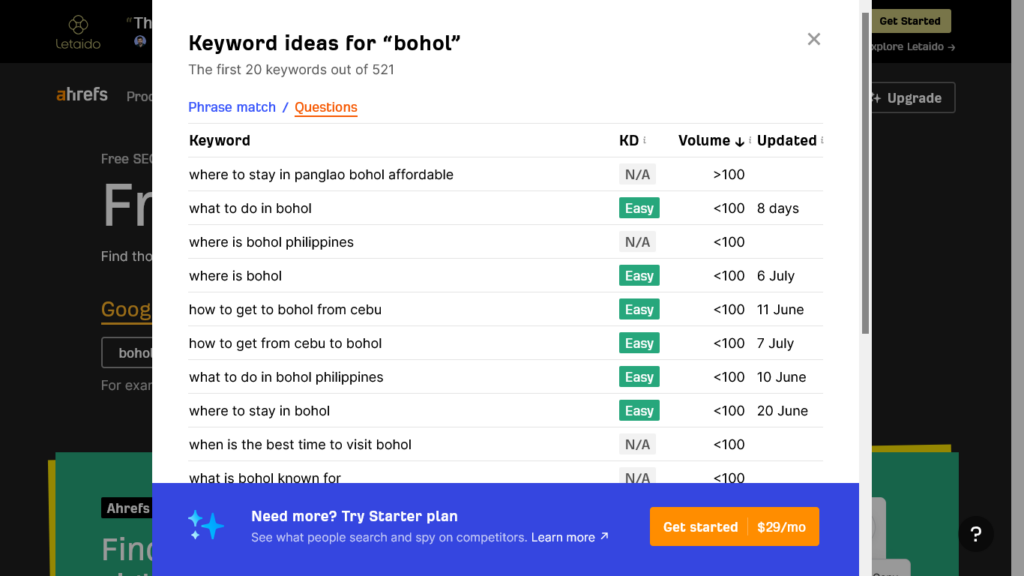
If you see the keyword in the results, that means people are searching for it. You will also see how easy or hard it is to rank for it in search results based on the competition. Click Questions to find questions people are asking that you can answer in your next blog post.
If nothing appears in the results, try another keyword.
Write down any keywords you find in a list. That way, you have a backlog of article ideas!
Step 5: Follow a Content Strategy
Now it’s time to form a content strategy. This will save you from overthinking and keep you productive. Here’s the routine I follow every time I write a blog post:
- Pick a keyword from your list to write about.
- Do some research and take down notes.
- Figure out what type of post you need (how-to, listicle, etc).
- Create an outline for your post.
- Write a good title for your post using power words.
- Write like you’re talking to your reader.
- Break up paragraphs and use bullet points.
- Add non-AI images: either your own images or free stock images.
- Proofread and publish your post.
My Recommendation: Don’t use AI to write your blog posts. You can use AI to help you do research and draft an outline, but it shouldn’t replace you as a writer. Always make sure your articles have your unique voice and perspective.
As a beginner, I suggest you publish a new post at least once a week. This will help you grow faster as a new blogger. But remember: you decide what blogging schedule works best for you.
As for how long your post should be, you can make it between 1,000 and 5,000 words. But remember: focus on helping the reader and avoid adding fluff.

Step 6: Optimize for SEO
Finally, you should do some basic search engine optimization (or SEO). This helps your blog show up on search engines like Google and AI platforms like ChatGPT.
Yoast SEO Plugin
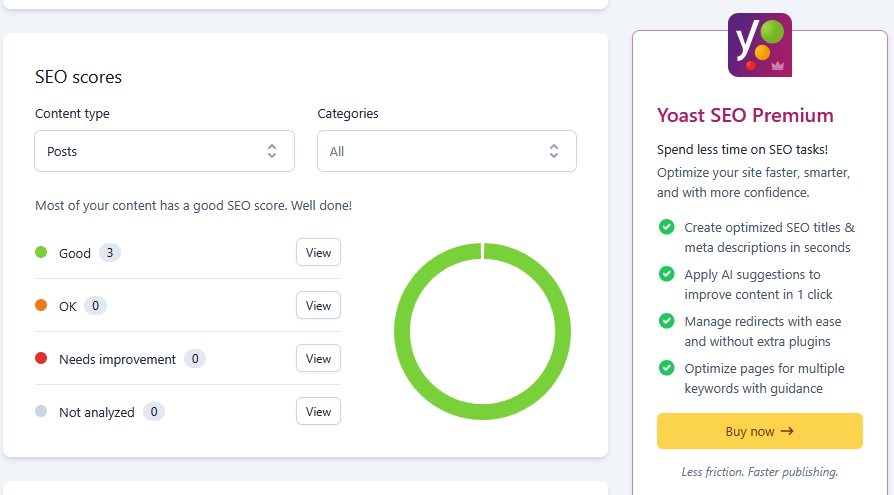
Thankfully, SEO doesn’t have to be hard. Just use the Yoast SEO plugin.
Yoast uses a “traffic light” system to see how well your content aligns with your keyword. Green means good; red means it needs improvement. You can find the traffic light in your WordPress editor.
Yoast also helps you do SEO things like:
- Write a meta description for Google and other search engines
- Add structured data to make it easier for search engines and AI to read your blog
- Set up Google Search Console to see your blog’s performance
- Use noindex to hide pages from Google search results
To learn how to do SEO with Yoast, check out Yoast’s SEO for beginners guide here.
Structure Your Posts
Another simple way to do SEO is to structure your blog posts:
- Create categories in your niche and add a category to each post
- Form topic clusters, with a pillar post and supporting posts
- Add links between your pillars and supporting posts
- Add links to your pillar posts on the homepage and navigation menu
Speed Up Your Site
One more thing: make sure your blog loads fast. If people bounce from your site because it’s too slow, Google and AI assistants will assume your site is not good.
Webfort has some great tips on how to speed up your website here.
My Recommendation: Don’t rely solely on Google. You can still get traffic from Google, but not as much as before. AI is slowly taking over search. Instead, use any social platform like YouTube or a podcast. Once you have an audience there, invite them to your blog.
Once you get some traffic on your blog, it’s time to make money with it!
Method 1: Showing Ads
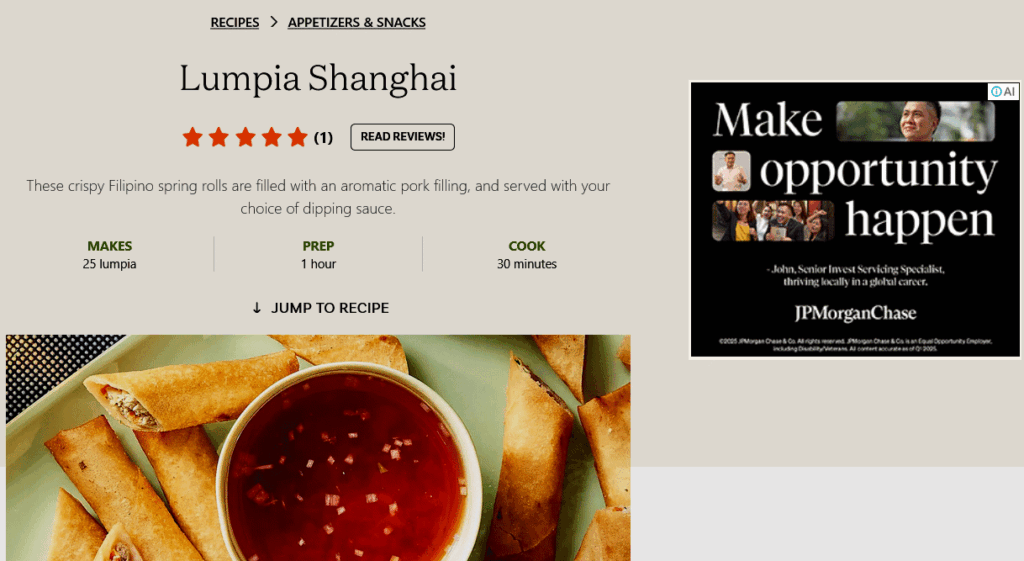
Ads are annoying, right? But that’s how many website owners make some of their money.
Online brands pay an ad network to show their ads on the websites that are part of the network. When you join an ad network, your readers will see ads from these brands.
Every time a reader sees an ad (an “impression”) or clicks on an ad (a “click”), the ad network makes money and you, the site owner, earn a small commission.
Ad Networks
Here are some trusted ad networks that are easiest to get started with.
| Name | Traffic requirement | Perfect for… |
|---|---|---|
| Google AdSense | None | Most blogs and websites |
| Adsterra | None | Earnings based on user engagement |
| Monetag | None | Simple user-friendly ads |
| HilltopAds | None | Higher pay from quality clicks |
| Journey by Mediavine | 1,000/month | Aspiring lifestyle bloggers |
| Raptive | 25,000/month | Large community-focused blogs |
My Recommendation: Go with AdSense. Their sign-up process is simple, they’re available worldwide, and they’re perfect for small blogs like yours. No traffic needed to get started!
Before you set up AdSense, make sure you read their policies carefully. These include:
- Don’t click on your own ads or encourage others to do so
- Make sure your content is family-friendly and not spammy
- Avoid modifying AdSense code
Set Up Google AdSense
Here’s how to get started with Google AdSense:
- Go to adsense.google.com.
- Sign in to the Google account where you want to use AdSense.
- Enter your website name and country.
- Tick the box to accept the agreement. Click Start using AdSense.
- Wait for your blog to be approved.
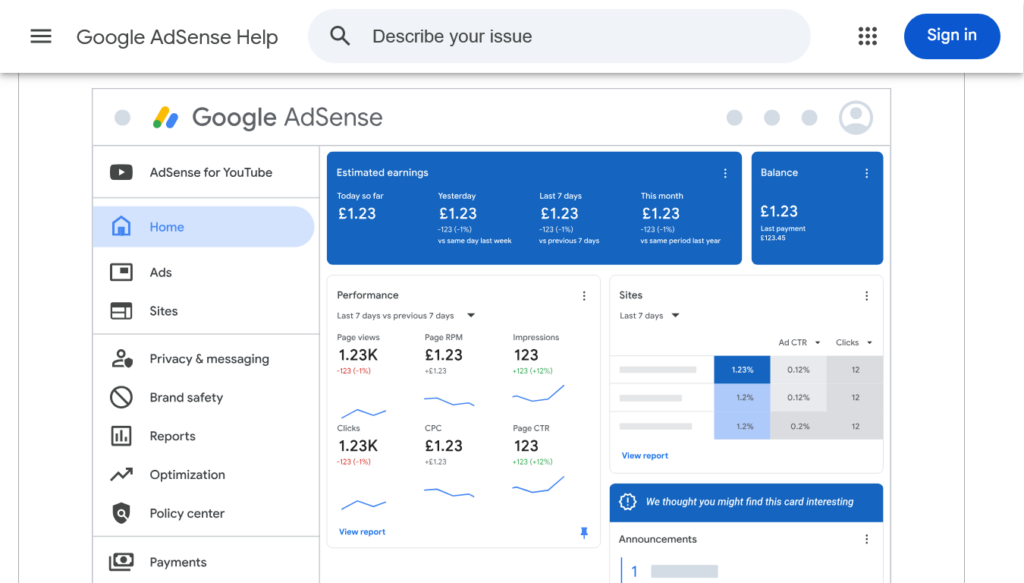
If your blog’s approved, congratulations! You can visit adsense.google.com to see your AdSense dashboard. This is where you will find your ad code, manage your blog’s ad placements, view ad clicks and impressions, and get paid.
If your blog was denied, don’t worry! You can try these Google AdSense alternatives instead.
Enable Google AdSense
The easiest way to activate AdSense on your blog is with the free Site Kit plugin. Here are the steps to do it:
- Log in to your site’s WordPress dashboard.
- Install the Site Kit plugin on your site.
- Log in to the Google account with your AdSense profile.
- Go to Site Kit’s Settings and look for AdSense.
- Follow the instructions. The plugin will add the ads for you.
If you’d rather add AdSense code manually, follow these steps provided by Google.
My Recommendation: Write a Privacy Policy. Google and other ad vendors use cookies to track where your readers are browsing online. Due to data privacy laws, you should write a Privacy Policy disclosing this. I also suggest using the CookieYes plugin to give your readers control over the cookies tracking them on your blog.
The Key to Start Earning
To start earning with AdSense, you need to know what kind of ads your audience prefers to click on. This is where running an experiment comes in.
An experiment is an A/B test where one half of your readers sees one ad layout, and the other half sees a different layout. The layout that leads to more ad clicks is the winner.
Here’s how to start an experiment:
- On your AdSense dashboard, go to Optimization, then Experiments.
- Under Auto ads or Blocked controls, go to Create new experiment.
- Name your experiment and set up the two ad layouts you want to test.
- Enable Automatically choose winner so your winning layout becomes visible to everyone.
- Click Create to begin the experiment.
It helps to do multiple experiments to figure out if a different ad layout has more earning potential.
Your Google AdSense Earnings
How much you will earn blogging with AdSense depends on several factors, such as:
- How much traffic your blog has
- What countries your traffic is from
- Your blog’s niche and content
- The layout of your ads
- How much the brands are paying for the ads
- What your readers do after clicking an ad
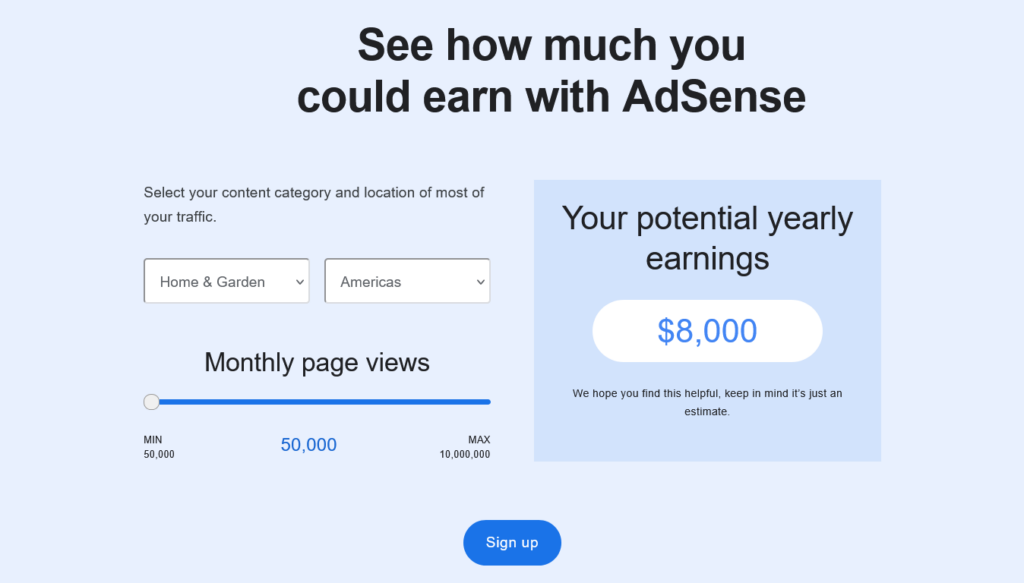
But, in general, with AdSense, you can expect to earn anywhere between $1 and $5 for every 1,000 users who visit your blog. Play with AdSense’s revenue calculator to see your earning potential.
You can view your impressions, clicks, and earnings anytime on your AdSense dashboard.
AdSense pays you out automatically every month. They offer these methods of payment. To see your payment schedule or change your payment method, visit Payments on your dashboard.
Read more: How to Make Money Blogging with Google AdSense
Method 2: Affiliate Marketing
Affiliate marketing is where you make money recommending other people’s products on your blog.
You use a special link, called an affiliate link, to recommend something. Whenever someone signs up or buys using your link, you earn a commission.
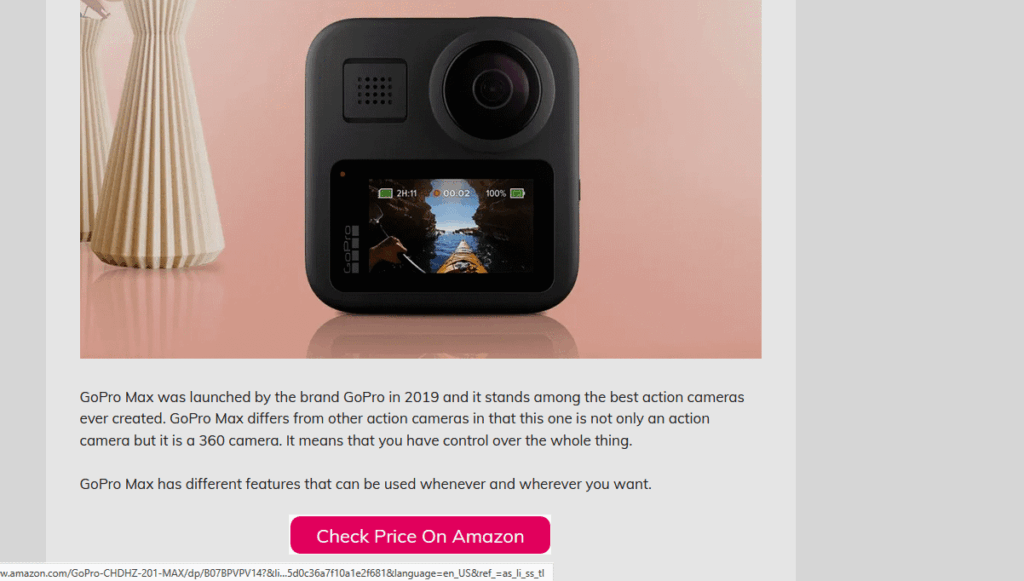
Here’s an example of a blog promoting a GoPro on Amazon using an affiliate link.
In this section, I’ll walk you through:
- How to find affiliate programs
- How to place your affiliate links
- How to write an affiliate disclosure
- How to track your earnings
Find Affiliate Programs
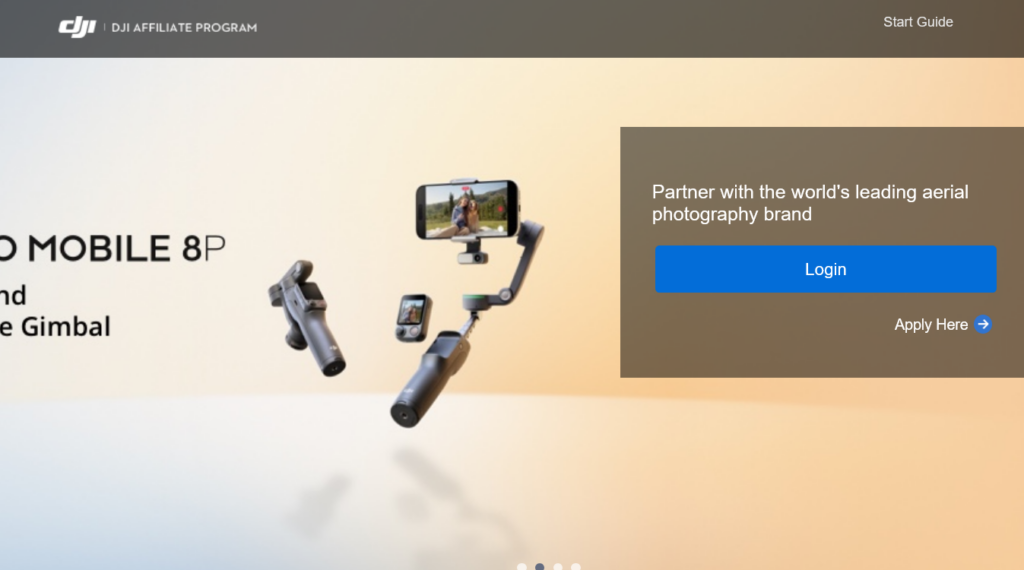
First, you’ll need to sign up for an affiliate program to receive your own affiliate link.
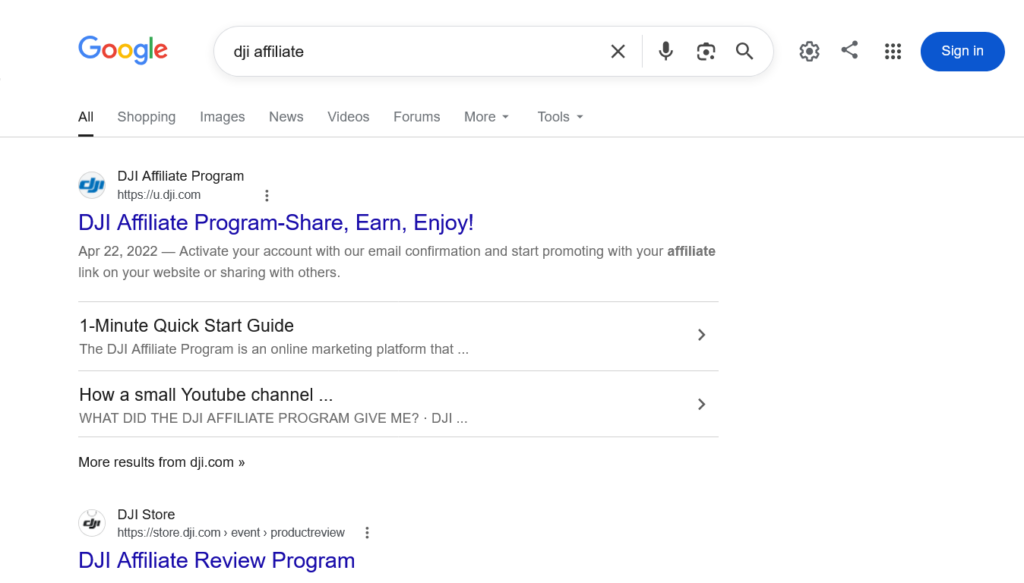
If you already know what product you’d like to promote on your blog, you can use Google to see if they have an affiliate program. Try entering the brand name + “affiliate.” Make sure it’s the official brand’s website, like this:
You can also sign up for a retailer’s affiliate program and promote whatever they’re selling.
Amazon Associates is the most popular retailer affiliate program. Other retailers with affiliate programs include Walmart, Barnes & Noble, Woolworths, and Lazada.
Some affiliate programs make you sign up for an affiliate network, such as Impact or Awin. These networks help brands find affiliates to promote their products.
You can use affiliate networks to find other affiliate programs to join. In some cases, a brand may discover you and invite you to join their program (which you don’t have to if you don’t want to).
When you sign up for an affiliate program, you will enter your website and answer a few questions. You may need to wait a day or two to be approved.
My Recommendation: If you use a moneymaking app, share your referral link. It’s the same thing as an affiliate link. If you think your viewers would enjoy the app you’re using, add your referral link to your blog post and get paid in-app each time someone signs up!
Place Affiliate Links
Once you’re logged in to the program, find the product you want to promote and locate your affiliate link. You may also see banners and ad templates, which you can experiment with on your blog, but I’d stick to using a link. You may want to save the link in a text file for easier access.
Now, where you place that affiliate link matters! You shouldn’t mention a product or place an affiliate link unless it makes sense to do so.
In the case of an action camera, for example, you should only mention it if:
- Your article is about helping people film, take photos, or do YouTube, or:
- Your article focuses on the camera (like a review, a comparison, or a list of “best” cameras)
When placing the link, I suggest using a button to make it clean and eye-catching.
If the link looks ugly, use the free PrettyLinks plugin to cloak it with your blog’s domain.
Affiliate Disclosure
You should also add an affiliate disclosure. This is required by the US Federal Trade Commission (FTC) to ensure that readers know what will happen when they click an affiliate link.
There are two ideal places for an affiliate disclosure:
- At the top of every article on your blog
- Somewhere near the affiliate link itself
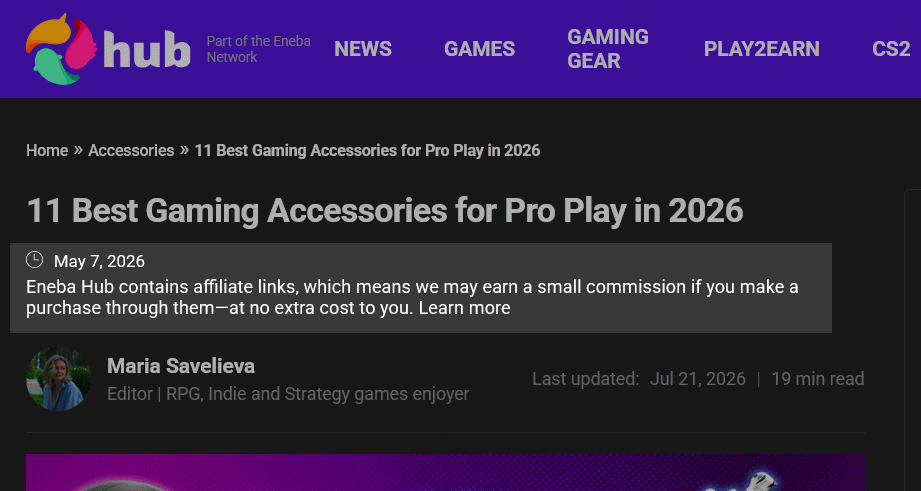
Here’s my affiliate disclosure, which you’ll see at the top of my articles:
DISCLOSURE: I use affiliate links to show you apps and services that can help you make money online. If you click a link in this post and sign up or buy, I may earn a commission at no cost to you.
Note that if you’re promoting Amazon products, the Amazon Associates agreement requires you to say something like: “As an Amazon Associate, I earn from qualifying purchases.“
I also recommend adding an affiliate disclosure clause in your Privacy Policy. Affiliate links use cookies to track where your readers are browsing online. Here’s how to write a Privacy Policy.
Your Affiliate Marketing Earnings
How much you will earn from affiliate marketing depends on the product you’re promoting. Some affiliate programs even pay you for anything the reader buys or signs up for with that link, not just the specific product you’re promoting.
Log in to your affiliate dashboard. There, you should see how much you will earn for getting a sale or sign-up on a product using your link. If you see a percentage, that’s your commission rate, and it tells you the percentage of the product price that you earn.
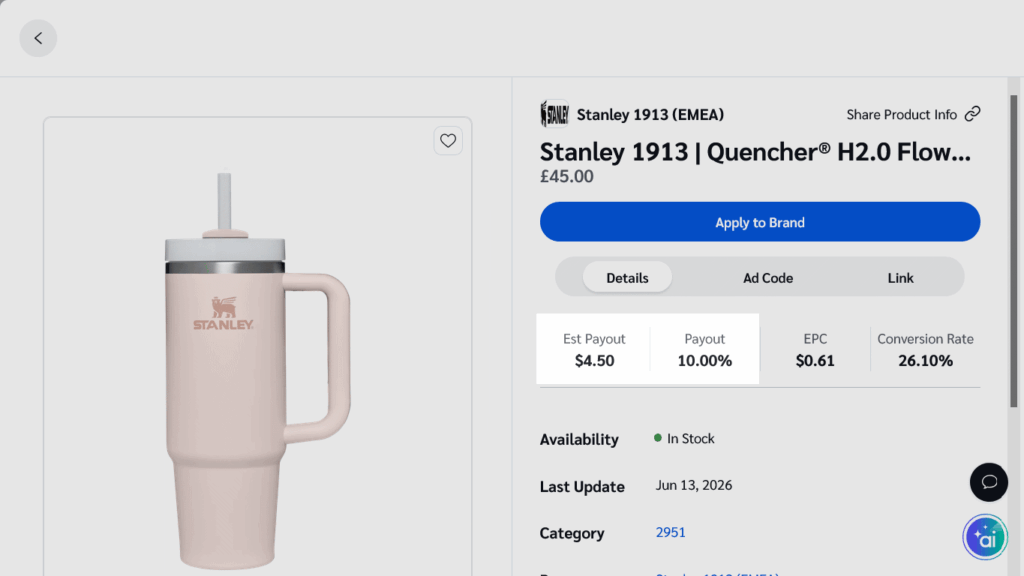
Most affiliate programs pay via bank transfer, while others can pay via PayPal. You usually get paid every month when you reach a certain threshold. To know for sure, check your affiliate dashboard.
Typically, physical products pay you 5-15% of every sale or sign-up made, while digital products or services can pay you 10-50%.
Read more: How to Make Money Blogging with Affiliate Marketing
Method 3: Sponsored Posts
A sponsored post is a post that a brand pays you to write. Unlike affiliate marketing, sponsorships pay you for every post you write rather than every sale you make. This practice is also known as influencer marketing.
Sponsored posts help brands acquire new customers from your audience. If you have plenty of readers, you can make good money by sponsoring a brand on your blog.
You can find brands to partner with using a sponsored post network. This is a site that connects brands with bloggers and other content creators.
Here are some you can try:
| Name | Niches accepted |
|---|---|
| Get Blogged | Any niche as long as it’s clear |
| Intellifluence | Fashion, hobby, and lifestyle |
| Upfluence | Society, beauty, and lifestyle |
| Cooperatize | Travel niche only |
| Aspire | Fashion, beauty, and fitness |
| IZEA | Fashion, beauty, travel, and lifestyle |
Follow these steps to write sponsored posts:
- Sign up for the sponsored post network.
- Create a profile with a link to your blog.
- Select a brand you want to partner with.
- Once they accept, write the post according to their criteria.
- Submit your post for approval and get paid.
Note that some brands will also see your profile and invite you into a partnership if interested.
Depending on the brand, you can earn $50 to $100 per post. If your blog gets popular, you can earn up to $500 per post! Most sponsored post networks pay out via PayPal.
Method 4: Email Newsletter
Note: This method requires a Stripe account. Check if Stripe is available in your country.
If you don’t mind extra writing, you can make money sending a newsletter to your readers via email. You make money by including sponsored ads in your emails, similar to showing ads on your blog. Whenever someone clicks your ad, you get a commission.
But first, let’s talk about how you get your readers into an email list:
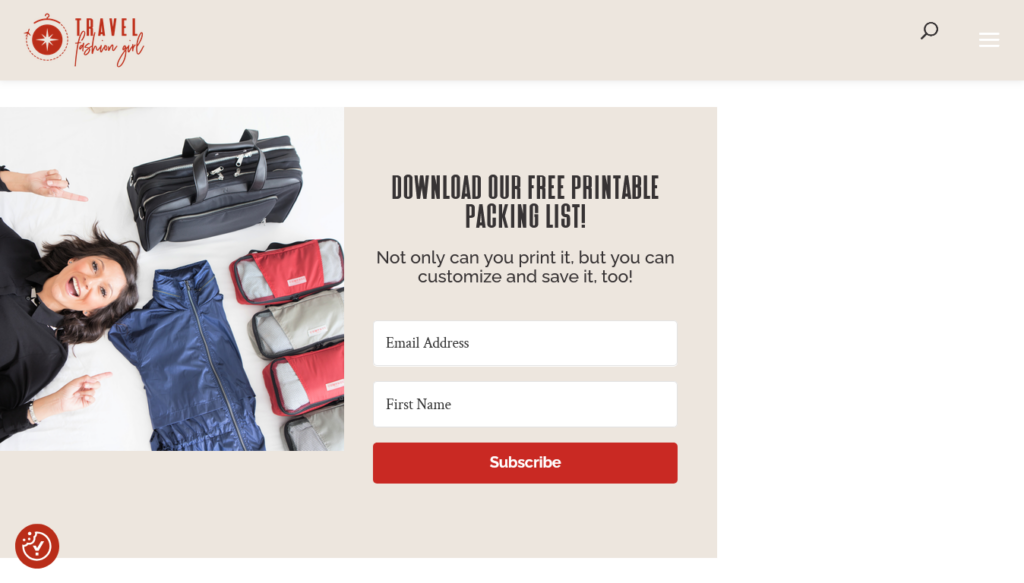
- It starts with an opt-in form on your blog.
- The form advertises something called a lead magnet. This is a free download for your subscribers, like an ebook or a checklist.
- When someone enters their email, they receive the lead magnet, and their email is added to your email list.
Here’s an example of an opt-in form advertising a packing checklist:
Make Your Lead Magnet
Let’s start by making your lead magnet.
As I said earlier, the lead magnet is a digital download, like an ebook or a checklist. For food bloggers, it might be a recipe, and for travel bloggers, it might be a travel guide.
- To write a simple document, like an ebook or checklist, you can use Google Docs. Once you’re done, you can download it as a PDF.
- For a visual infographic or digital template, use Canva. They offer a variety of creative tools and, when you’re done, you can download it as a PDF.
Use Kit for Your Email List
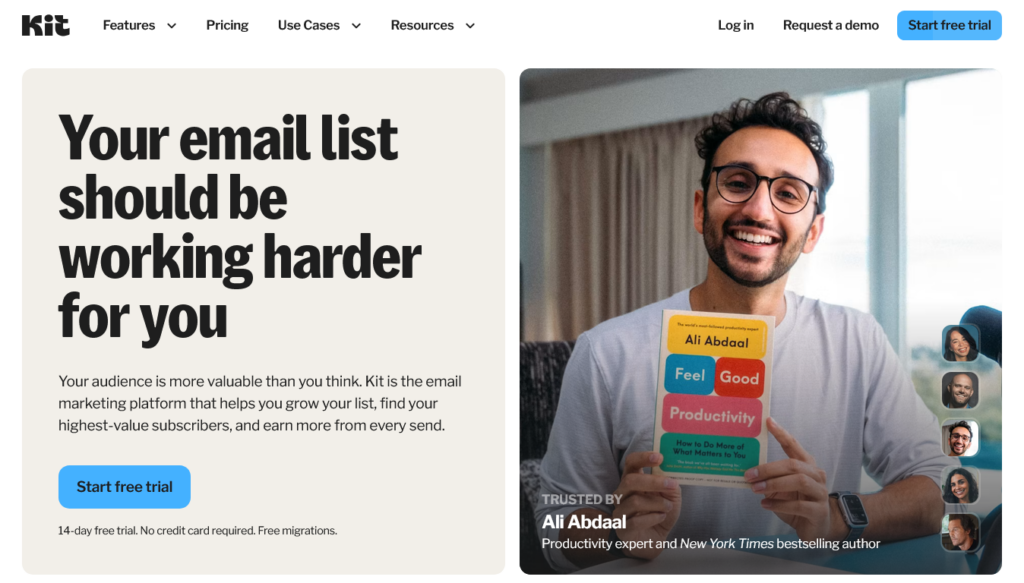
Now you need a program to help you create your opt-in form, send out emails, and maintain your email list. For this, I recommend Kit. Here’s why:
- They cater to bloggers and other content creators
- They are simple to learn and offer a clean dashboard
- They have a free plugin to add your form to your blog easily
- They offer a 14-day free trial of their Creator plan, no credit card needed
Use my affiliate link below, click Start free trial, and create your Kit account to get started.
My Recommendation: After the trial, downgrade to the free Newsletter plan! It has everything you need to do this tutorial. Once your list grows, consider upgrading to the $33/month Creator plan.
Your Welcome Email
First, let’s write your welcome email to thank a new subscriber and give them your lead magnet.
- Sign up for Kit if you haven’t already.
- Go to Automation > Email Sequences.
- Make a friendly subject line like “Welcome, here’s the ebook I promised!”
- In the body, thank the reader for subscribing.
- Include a link to your lead magnet.
- Schedule the email to be sent “0 days after last email.”
Design Your Opt-In Form
Next, let’s design your opt-in form to advertise your lead magnet and collect emails.
- Go to Audience Growth > Landing Pages & Forms.
- Create a form (I suggest inline).
- Advertise your lead magnet in the headline.
- Design your form to your liking.
- Publish your form.
Your form should look something like this:
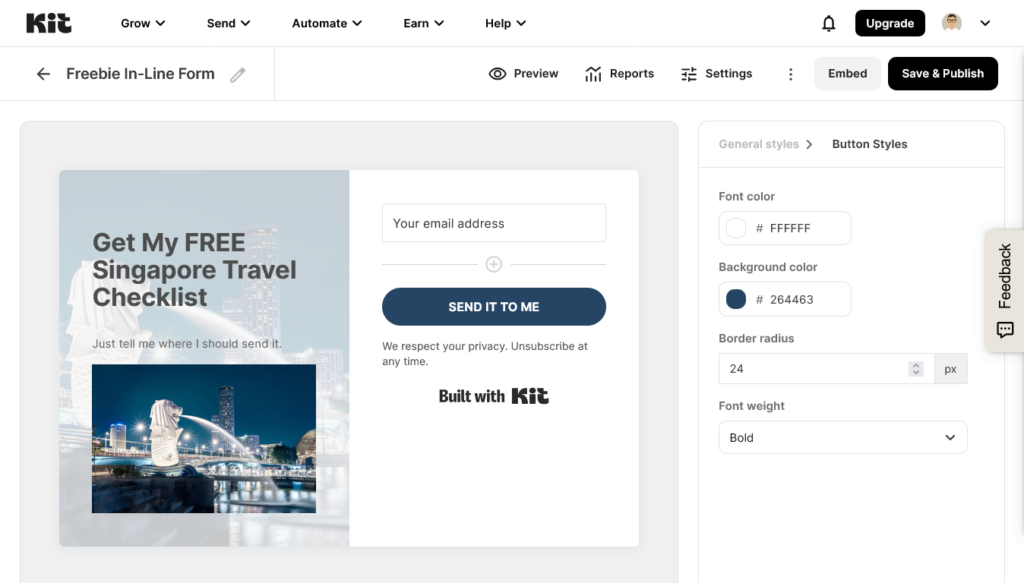
To embed your form on your blog, you can use the free Kit plugin. Wait until you have a few subscribers, then proceed to the next step.
Send Your Email Updates
Once you have a few readers on your email list, send them your emails. Here are some things you can talk about:
- What’s new in your niche
- A recent life event or anecdote
- A new blog post that you published
- An exclusive recipe
To send an email, go to Broadcasts > New Broadcast. There, you can send your email right away or schedule it to be sent out whenever you like.
I recommend sending an email once a week. If that’s not possible, try at least 3 times a month.
Monetize with Sponsored Ads
Now that you’re writing emails, it’s time to make money showing sponsored ads! Remember to set up payments on your Kit account first.
Here’s how to start showing sponsored ads:
- Go to Earn > Newsletter Sponsorships.
- Find brands you’d like to promote and select “I’m interested.”
- You’ll get an email if the brand shows interest. Review and accept or decline the offer.
- After accepting an offer, set the date for it to appear.
- Write an email and include a Sponsorship content block.
- Tell your readers about the brand you’re advertising to build trust, but don’t solicit clicks.
- Schedule the email to be sent out on the date of the offer.
And that’s it! You’ll earn for every ad click you get.
On average, you can earn $1 to $2 per ad click. Payments will be sent via Stripe 45 days after the end of the month when the ad was running.
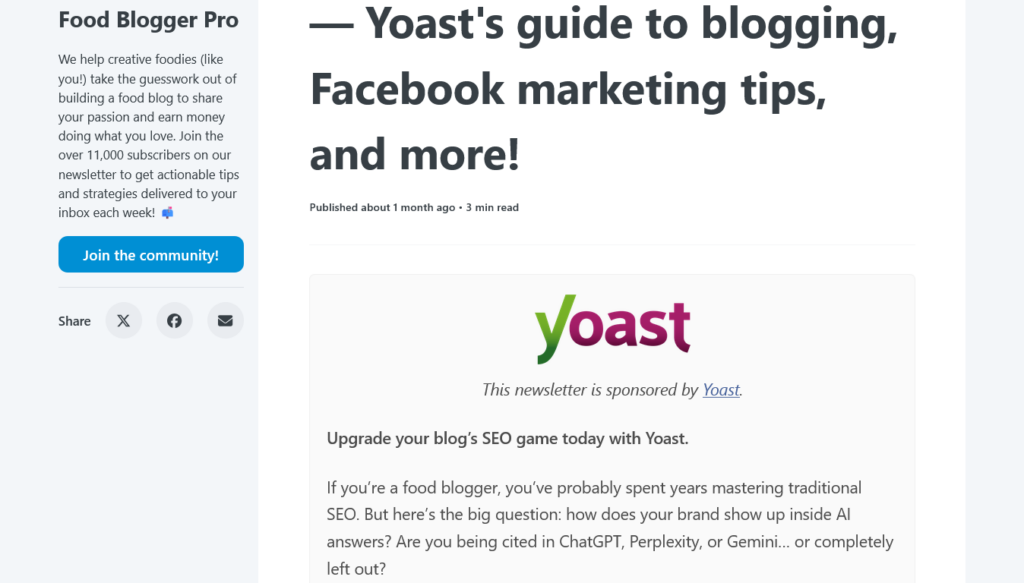
By the way, you can also make money on Kit by selling digital products and recommending people in Kit’s Creator Network. You can even collect small tips (donations) from your blog readers!
But overall, ads are the simplest way for beginners to start earning with their emails.
Method 5: Selling a Course
An online course is a series of lessons on a broad topic related to your blog’s niche. You can make money by selling exclusive knowledge to your readers.
For beginners, I recommend Udemy.
Unlike Teachable or Thinkific, which give you another webpage to manage, Udemy simply lets you record video lessons on their own website. Best of all, it’s free to teach on Udemy!
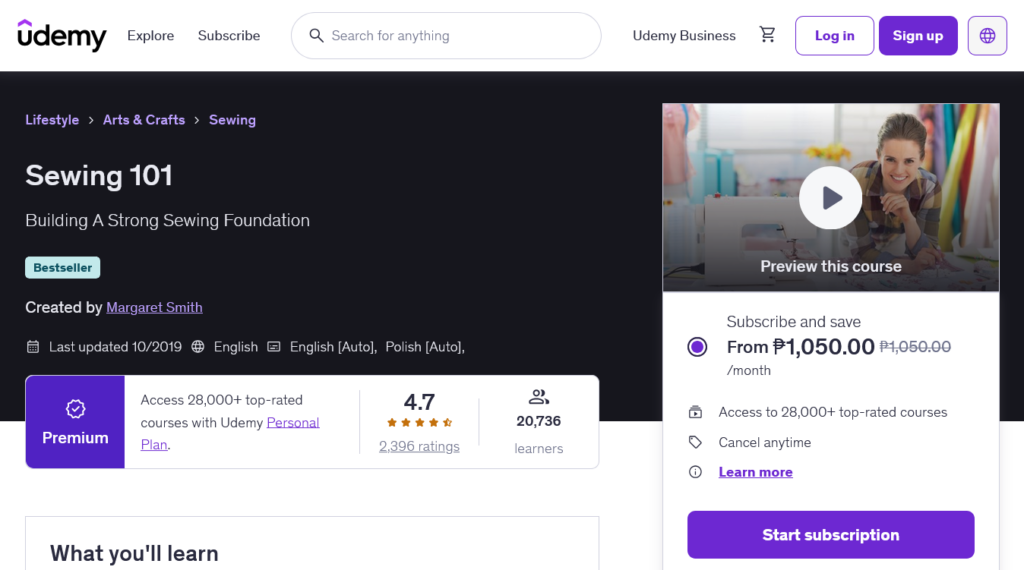
Here’s how to sell a course on Udemy:
- Sign up for a free Udemy instructor account.
- Outline your course topics.
- Submit a test video to get feedback from a Udemy reviewer.
- Record your video lessons.
- Upload them to Udemy.
- Apply to become a Premium instructor.
- Set a price for your course.
- If you like it, publish your course.
- Promote your course on your blog using links and coupons.
If someone buys your course through your referral link or coupon, Udemy pays you 97% of the sale. They also pay 37% of the sale if someone buys your course from the Udemy directory. You can learn about how much you’ll get paid here.
Udemy pays you out via PayPal, Payoneer, Tipalti, or US (ACH) bank transfer.
My Recommendation: Use Skillshare instead of Udemy if your niche is more creative. Like Udemy, they let you record videos and sell them as a course on their website. Skillshare’s library includes graphic design, animation, videography, photography, and web design.

Method 6: Paid Community
A paid community lets you sell access to exclusive freebies and a tight-knit chat group.
Before starting a paid community, make sure you’re already engaging with your readers. Reply to comments on your posts and respond to any emails you get. By showing readers that you care for them for free, you give them confidence to join your paid community.
So where do you build your community? I recommend Skool.
For just $9 a month, they offer a clean group space and lots of ways for members to interact. You can also host live workshops and create both free and paid courses inside the group.
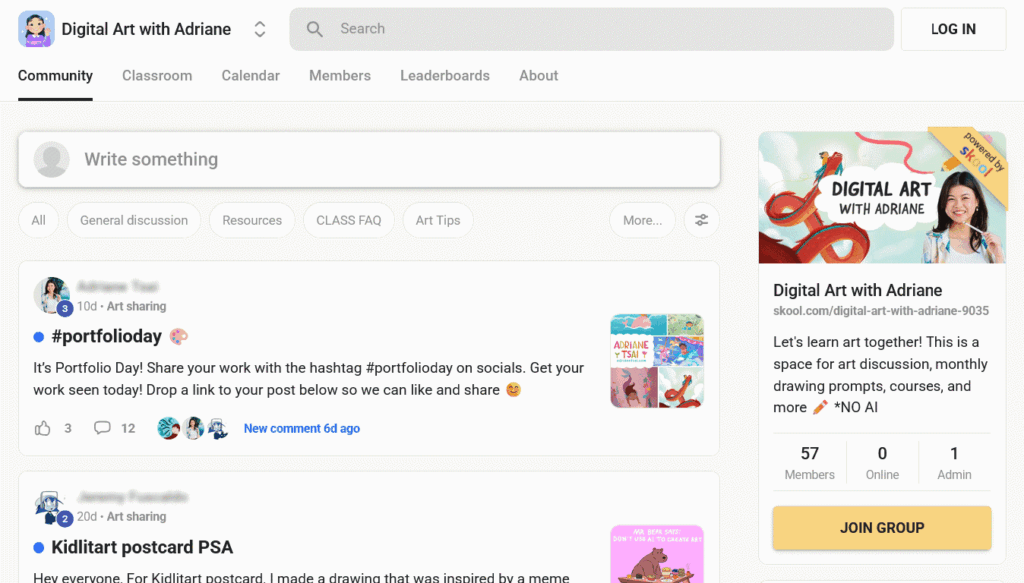
Here’s how you start your blog’s Skool community:
- Go to Skool’s signup page and click Create Your Community.
- Complete the signup form and get a free 14-day trial of Skool ($9 a month after).
- Pick a name and URL for your community.
- Upload your banner, blog logo, and colors (design a banner on Canva).
- Add some categories and posts that can benefit your blog readers.
- Set up your paid tier (I also recommend a free tier for those not ready to pay).
- Advertise your new community on your blog.
And that’s it! Once people start paying to join your community, you make money. Skool will pay out your earnings to your bank account every Wednesday.
Conclusion
And there you have it: this is how you make money blogging as a beginner in 2026.
Is Blogging Right for You?
If you enjoy writing about topics for your audience, then blogging is a great choice! But it’s not your only option. You can also make money doing YouTube or running a podcast.
YouTube is perfect for vloggers and video creators. Unlike blogging:
- You can express yourself on camera
- Your audience can hear your voice
- You can easily get traffic without AI search in the way
- YouTube is 100% free to use and monetize!
Check out my YouTube guide to start making money on YouTube instead!
If video isn’t your thing, look into starting a podcast! Unlike blogging:
- Your audience can hear your voice
- Your audience can listen as they go about their day
- All you need is a good-working microphone
- Podcasting is 100% free to use and monetize!
Visit my podcasting guide to start a podcast and make money!

Beginner Guides
For other ways to make money online, check out my other guides:
Thanks for reading and happy earning!
FAQs About Blogging
If you run ads, you get paid $1 to $5 for every 1,000 views. As an affiliate, you get paid a percentage of the product’s selling price. If you sell a course or a community, you can set your own reasonable price. Learn more here.
While you technically can make money with a free blog on a platform like Blogger, Wix, or Squarespace, it’s actually difficult in practice. Google and AI assistants look at free blogs as low-quality sites, making it harder to get traffic. And even if you had traffic, many ad networks, affiliate programs, and sponsored post networks will reject your site for not being self-hosted. To make serious money blogging, you need to buy hosting.
That depends on how long it takes to get traffic to your blog. If you’re relying on SEO from Google and AI search, it can take months to see traffic. After that, it only takes weeks to start seeing income from ads, affiliate marketing, or digital selling.
Once you have an active audience, writing sponsored posts is the fastest way to make money with a blog. Unlike running ads or selling products, companies pay you as soon as you write their blog post, making it a quick way to earn blogging income.

Hey, it's Matthew! I enjoy computers, so when I discovered making money online in 2017, I knew I had to try. Over time, I made hundreds of dollars taking surveys and doing user testing. Today, I continue looking for simple ways to earn online and share what I learn here on WebCents.