WordPress is a content-management program that many websites and blogs use, simply because it makes managing your blog or website simple, quick, and easy. In fact, over one-third of the World Wide Web is run on WordPress!
With a WordPress blog, you could earn amazing passive income from the comfort of your home. This is why you need to know how to use WordPress and how you can set up a blog using WordPress.
Now, if you don’t have one yet, follow my six easy steps to starting a WordPress blog.
Or maybe you already have a blog and you want to install WordPress or just learn how to use it. Well, look no further! In this article, I will show you how to work around WordPress, from the very basics to everything you need to know about WordPress that can help you set up or improve your blog.
And the best part is that this article will work for anyone, whether you are a beginner or an amateur who’s just not familiar with WordPress.
So here’s what you’re about to learn step by step:
- Learn the steps it takes to install WordPress into your blog.
- Understand all the WordPress features that you can use.
- Find the best plugins to use for your WordPress.
- Discover some tips on how to better use WordPress.
So with that said, let’s start learning WordPress!
Step 1: Install WordPress
Start a Blog and Automatically Install WordPress
Well, first of all, I’m assuming you already have a blog, but again, if you don’t have a blog yet, I’ve put together a step-by-step guide on how to start a blog in just six simple steps.
Also, I highly recommend you follow the steps I laid out on that guide. By following it, you won’t have to go through all the trouble of actually installing WordPress. By doing these six steps to starting a blog, WordPress will already be installed!
After following the guide, you can skip this step and move on to Step 2.
Maybe You Have a Blog You Started for Free
Now, if you have a blog that you started with a third-party service for free through sites like Blogger, Weebly, Wix, or WordPress.com, and you have a subdomain to get to your site, then I recommend you buy hosting.
In this case, you’re going to have to follow my steps to starting a blog as if you don’t have a blog. If you have some articles and photos on your free blog, try to find a way to backup your blog files so that, later, you can export them to your new WordPress blog. But here’s the bad news:
Some free blogging websites don’t have a way for you to backup or export your files. Unfortunately, you may have to start your blog over. This is why I do NOT recommend you grow a free blog.
Again, follow these steps in order to get a real blog started!
Install WordPress Manually on Your Blog
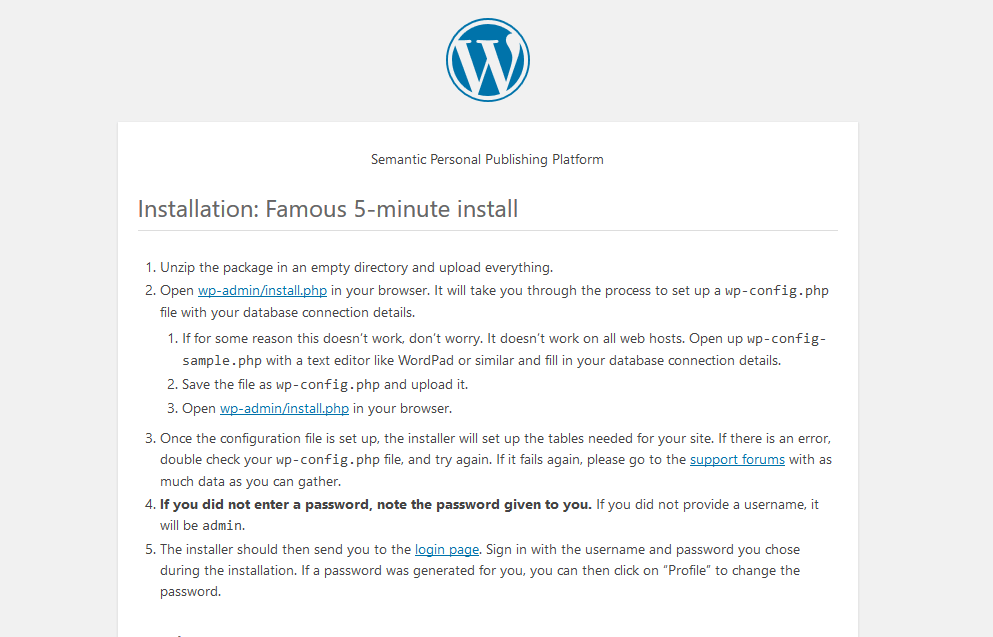
If you already have a blog that you pay for, but your hosting provider does not come with WordPress or you’ve been using a program like Squarespace or Dreamweaver, then you will need to install WordPress manually. WordPress calls this the Famous 5-Minute Install.
I’m not going to go into too much detail about how to install WordPress manually. But here are the steps in a nutshell:
- Download the WordPress files, unzip them, and upload them to your blog using your website’s file manager.
- Type in your blog’s URL and add “/wp-admin/install.php” at the end. Follow the steps to configure WordPress to your blog.
- WordPress will then install itself on your blog.
- Remember your WordPress password. If you didn’t create one, save the password WordPress will give you. If you didn’t choose a username, by default, your username is “admin.”
- You’ll be redirected to your WordPress login page. If you’re not at the login page, just add “/wp-admin” to your blog URL. Enter the username and password to log in to your WordPress dashboard.
Here’s a screenshot of the steps in a bit more detail:
If you’re still not sure of what to do, here’s WordPress’s complete guide to installing WordPress on your blog.
Step 2: Understand the Features
Learn the WordPress Dashboard
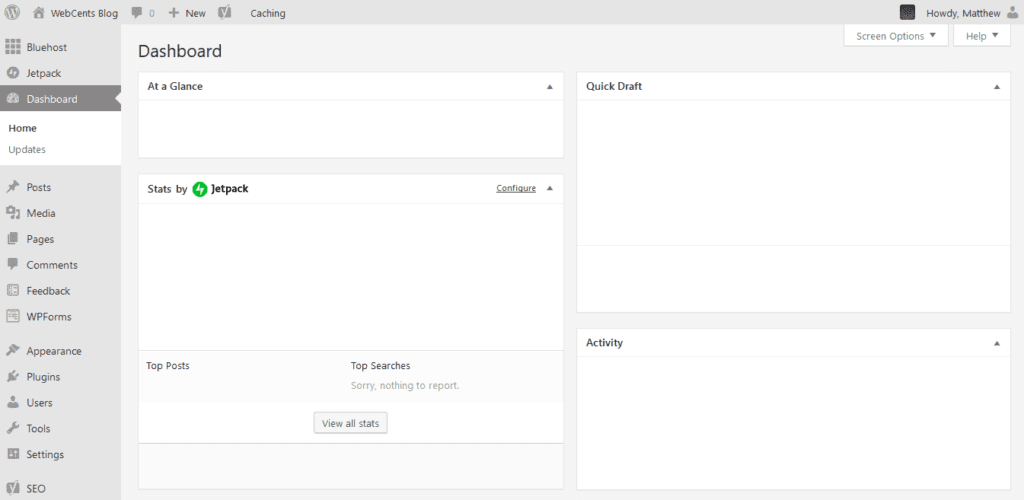
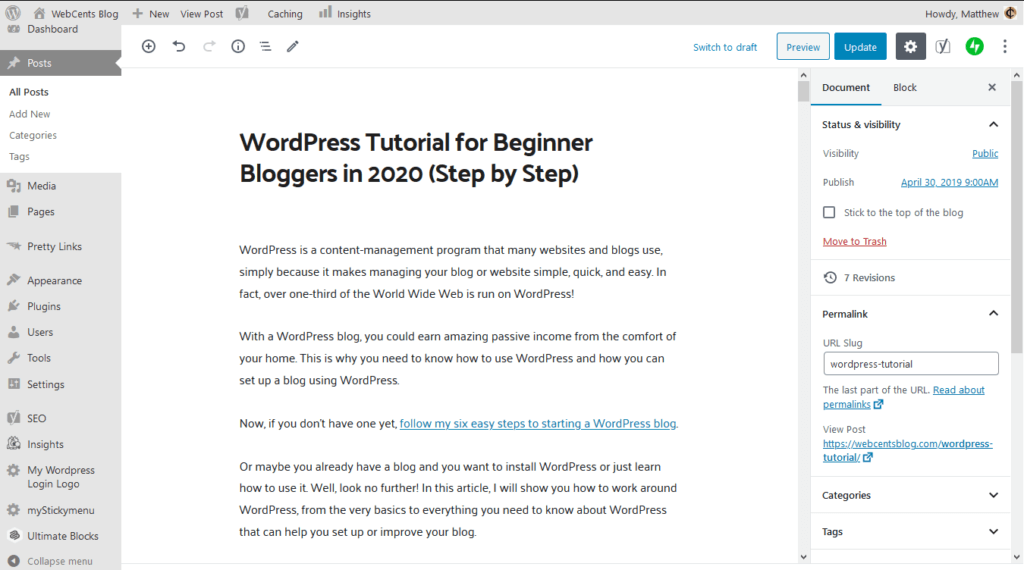
Once you’ve got WordPress installed and you’re logged into your WordPress account, you will see the WordPress Dashboard.
The Dashboard is the home page of your WordPress, where you can show or hide widgets related to your blog. Here are some examples:
- At a Glance: lists the number of blog posts and pages you have
- Quick Draft: lets you create a draft of a blog post that you can work on later
- Activity: shows you what posts you added or scheduled to your blog
To show or hide a widget, use the Screen Options tab at the top of your dashboard.
At the top of your WordPress program is a bar where you can visit your live blog or website, create a new post, and go to your WordPress profile.
Your WordPress dashboard should look similar to this.
Go through the Tabs
You will see a bunch of tabs on the left. They give you different options that you can use to manage your blog, your site’s appearance, your WordPress plugins, and more.
Manage Your Posts and Pages
The articles on your blog (known as posts on WordPress) can be found in your Posts tab, below Dashboard. In the same way, you can find your blog’s pages in your Pages tab, underneath Posts.
Both these tabs allow you to see what your posts and pages are, edit them using the WordPress editor, choose the slugs (specific URL’s) for them, as well as create posts and pages and schedule them or save them as drafts.
Now, inside your Posts tab, you will also find a place to add categories and tags and assign them to your blog posts. This helps you organize your posts and helps your blog visitors find them.
Using the WordPress Editor
If you create or edit a post or page on your blog, you will see the WordPress Editor. WordPress uses blocks to help simplify your editing. Each block represents an element of your article, whether it’s a paragraph, a heading, a type of media, etc.
You also have other settings to configure your post or page using the bar on the right. There are other post/page editing tools at the top of the editor such as undoing and redoing as well as viewing your post or page’s structure.
If you’d rather not work with blocks, WordPress can let you use the old classic editor just by installing the Classic Editor plugin. (We’ll talk about plugins soon!)
One more thing: you can edit a few parts of a blog post without going to the Editor. You can do this by mousing over a post and clicking on Quick Edit.
Learn the Other Tabs
The Media tab shows you your blog’s images and videos that you uploaded to your site. You’ll be able to edit your media as well as add alt text to them inside this tab.
The Comments tab lets you see your blog’s comments and manage and delete them. You can disable comments on your blog by going to Settings > Discussion.
The Appearance tab allows you to change your blog’s theme. A theme changes the look and feel of your website and gives it a unique appearance to your readers. Feel free to check out my best free WordPress themes for some great ideas for your theme. Inside Appearance, you have several options:
- Themes: Install a new theme, switch themes, or delete old themes.
- Customize: Modify your theme’s appearance.
- Widgets: Select what widgets around your website that you want to show readers. Widgets keep your readers engaged.
- Menus: Add or delete links on your website’s navigation menu.
- Theme Editor: This advanced area contains your theme’s code. I do not recommend you go there unless you know how to code.
We’ll get to the Plugins tab very shortly.
The Users tab lets you customize your profile, change your account username and password, and allows you to add other people to contribute to your blog.
The Tools tab contains a bunch of tools where you can import and export all of your blog data, check your website’s health, and manage personal data on your site.
Know Your Site Settings
Lastly, the Settings tab gives you a bunch of settings for your WordPress blog. Here is a quick rundown of each area in this tab:
- General: Edit your website title, tagline, and address; add a membership area, and change the time clock on your site. (This clock is what records the times that your posts and pages get published)
- Writing: Set the default category for new posts you create and add the option to create a new post by writing it in your email and sending it to an email address of your choice.
- Reading: Decide what readers will see on your homepage, choose if you want posts in your search feed to be shown in its entirety or as excerpts, and control search engine visibility.
- Discussion: Manage your blog’s comment area and choose what profiles you want commenters to use.
- Media: Choose what are your three media sizes and if you want your media to be organized by month and year.
- Permalinks: Pick how you want your post and page URL’s to appear and what directory you want your categories and tags to be in.
- Privacy: Lets you choose what page you want to be the Privacy Policy page or allows you to create one for you.
Step 3: Find Helpful Plugins

What Is a Plugin?
A WordPress plugin is a feature that is compatible with WordPress which can give you additional options in your dashboard and left-hand tabs, and offer options and settings that aren’t built into WordPress. A plugin can basically give you more ways to work with your WordPress.
For example, you can’t change your font type using WordPress. But, with a plugin called Google Fonts, you will get the option to change your font type, size, and colors.
Install Some Plugins
Head over to the Plugins tab on the left and you’ll see any plugins that have been installed. To add a new plugin, choose Add New and you can search for plugins to install. You’ll also be able to see what options each plugin has before you install.
To get you going, I have shared my recommended WordPress plugins in a previous article. I explained each of them in detail and why I believe they can help you, so be sure to give that a read if you’d like some WordPress plugin ideas.
WARNING! Do not use the Plugin Editor unless you know how to code.
Do not delete a plugin unless it is more annoying than it is helpful. Make sure you know what options you will lose before you delete a plugin.
4. Learn WordPress Tips
Now that we’ve gone through the basics of WordPress, I’m going to share with you some helpful tips that will hopefully improve your experience when using WordPress for your blog. These tips are usually overlooked by WordPress beginners, so I hope you will find them very useful.
- Sign up for a WordPress.com account. This will allow you to download the WordPress app and manage your blog articles from any device whether it is your PC or even your mobile device. You can also login to the WordPress program easier, without needing a password, by keeping signed in to your WordPress.com account and simply selecting the option to sign in using that account.
- Review your WordPress site’s settings. In the Settings section, check your site’s name and tagline as well as your time zone. You’ll also want to look under Discussion to set up comments, Permalinks to set up how your links should look, and Privacy to create a privacy policy page for your site. While this may sound daunting, it can save you a lot of hassle in the long run!
- Find a good and user-friendly theme. Over in the Appearance section, don’t use one of the default WordPress themes. This gives your site a cheap and unprofessional look. I suggest at least free themes like this one, but later on this blog will have a paid theme such as Divi or X. If you have enough money to invest in one, I highly recommend using a paid theme. You can use the Appearance section to search for both free and paid themes.
Wrapping Up
Hopefully, you have now seen how amazing WordPress is compared to other site builders on the Internet, and why more site owners than ever are switching to WordPress.
The Next Steps
Now there’s more to blogging than just learning WordPress.
It can be hard to create good articles on your blog. Check out my tips on how to write an awesome blog post. You will also need to learn how to drive traffic to your blog, so I have several ideas for you to do just that.
Then, when you’re ready to make money with your WordPress blog, you might want to consider these ideas:
- Affiliate marketing: find products or services to show your readers. If they sign up or buy, you earn a commission!
- Create online courses: teach a skill related to your blog’s niche using multiple text and/or video lessons. Then introduce your blog readers to your online course and make money selling it.
- Start a YouTube channel: create the same blog content on a YouTube channel and make money using YouTube.
- Run ads on your blog: sign up for networks like Google AdSense or Adsterra where you can add code to make ads appear on your blog. If visitors see or click your ads, you earn a bit of money that can grow quickly over time.
A Great WordPress Resource

Of course, there are many aspects of WordPress that were not covered in this tutorial. I recommend you check out an amazing website called WPBeginner.
This site contains a lot of articles surrounding WordPress and can easily teach you how to use WordPress like a pro, even if you’re only a beginner. WPBeginner is definitely the site to go if you have problems using WordPress or if you’d like to learn everything there is to know about WordPress.
Conclusion
Other than that, everything that I’ve covered in this article should get you going well on WordPress. As long as you explore the program more and become familiar with everything it has to offer, you will find using WordPress to manage your blog or site simple and enjoyable.
I hope this article helped you out with WordPress and showed you how it can help you set up your blog and make it better for yourself and your readers.